Click on a walkthough title to go directly there
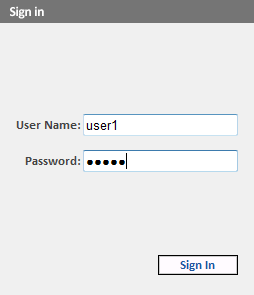
- Log into the admin system using your username and password supplied
- You will be given a username and password during your training session of when the system is first installed. Your username identifies you to the system allowing all changes you make to be tracked back to your user account. This can be helpful for diagnostics purposes. Requiring a username and password means that only authorised users can access the system to manage and administer the screens.
- Each user will have a specific set of permissions that is appropriate to the product and their user level
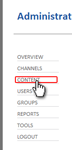 Click on Content Manager in the left hand menu
- The administration system has a number of top menu headings, allowing access into various parts of the system. This list will vary by user account, permissions and privilege level.
- Content that has already been uploaded to the system will appear in the Content Manager listings. It is organised into folders. The content will be in a folder named after the user who added the content item. You can return to here to modify any previous content settings, or to replace/update content files.
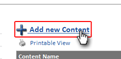 Click the “add new content” link
 Select "Video" as the content type
- Set the title of the content item

- The name you enter here is what the item will appear as under the Content Manager.
- In addition, when you schedule this item to a screen, this name will represent the item in schedule listings.
- Browse to a video file on your local PC or network drive

- This file will be uploaded from your computer or network drive to the Solus Distribution Server. Files of a size less than 100 MB are more suited to optimal system performance, although larger file sizes are still supported.
- Set the duration of the content item
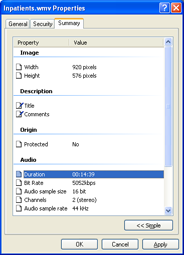
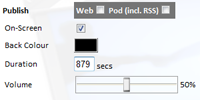
- This can either be set automatically by checking the Auto Detect Duration checkbox. When this is selected the system will automatically find the duration of the video and set duration of the content item to this value.
- The value can also be set manually if Auto Detect duration is not selected. If you specify a duration of less than the length of the original file, the item will cut off after the specified time. For example, if the file is 40 seconds long and you specify 30 seconds in the Duration box, then only the first 30 seconds will be shown and the remaining 10 seconds will not be displayed.
- The duration of a video can normally be found on a video file by right clicking on the file and choosing properties, clicking the Summary tab, then clicking "Advanced > >"
 Click the Create button
- Choose a screen (or screens) to schedule this item to
 Pick either individual screens or groups of screens to schedule this item to
- If you pick a screen that is included in a group that you also pick, the content will only be scheduled once in total.
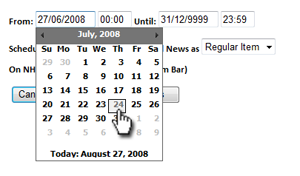
- Pick the dates (e.g. from today, for 1 week)
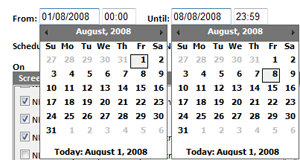
- Content will appear in the schedule loop from the time and date you specify and will stop being shown immediately on the time and date specified.
- For example, if you have a message to be shown from Monday morning, you could use this feature to schedule it on Friday or any point prior to that. This will give you peace of mind that the item will be shown at the right time without having to remember it first thing on Monday morning.
- Also, if you have a message to publicise a specific event, you can schedule the message to stop playing at the time of the event (at which point it will likely have become irrelevant).
- If you want the message to appear indefinitely, set the Finish date to 31/12/9999 using the text box.
- Choose Regular Item

- A “Regular Item” is a message you wish to be displayed on the screen as part of the regular loop of content.
- If you wish only certain items to be displayed for a period of time, schedule them as an “Alert Item”. When any one or more alert items are scheduled, any regular level items will be hidden from display. This can be useful if you wish to shown only a select few items for a short period of time, as you do not need to remove the other (regularly scheduled) items – they will simply be hidden. Once the alert item(s) have ended, the regular items will return to the display.
- For a single specific item to be shown, choose “Timed Item” scheduling. This is normally of use for specific extremely high priority and time sensitive items. There can only be one Timed Item per zone at any one time.
- If you have the Solus Freeview module and wish for a specific channel to be shown for a set period of time (for example, showing a sports event or other programme), then a Timed Item is most appropriate for this use.
- Click Save
- Select the Day Part
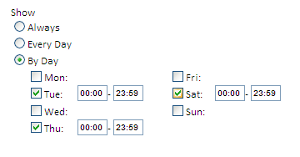
- The content item can be scheduled to be shown between certain times of the day or days of the week by editing the following options.
- Always. The content item will be shown whenever its position in the scheduled loop is reached.
- Every Day. Selecting this and specifying a start and end time will clause the item to be shown during those times e.g. to show an item only between 9 am and 12 noon select Every Day and enter a start time of 09:00 and a finish time of 12:00.
- By Day. This is similar to Every Day however it allows you to pick you to pick what days of the week you wish to show the item. Check each day you wish it to be shown on and enter both a start and end time.
- Set Email notification On/Off
- This is an optional feature that allows you to receive an email notifying you when your schedule is about to end. To activate it check the Notify checkbox and enter the number of days notice that you would like given.
- N.B. You must have an email address stored with your username account for this feature to work.
- Click Schedule
- Choose the Zone
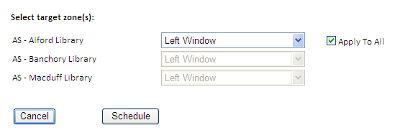
- Each screen is divided up into a number of zones. Your content item is then scheduled into the loop for a specific zone which you can choose from this screen.
- The default zone is the zone which matches the aspect ratio of the video if the Auto Detect Aspect Ratio is selected. If the aspect ratio for the content item does not match that of the zone a warning will be displayed.
- If all the channels feature the same zone layout there is an Apply To All checkbox which if checked means that that the selected zone for each channel will match the selected zone of the first channel in the list.
- Click Schedule
- Log into the admin system using your username and password supplied
- Click on Content Manager in the left hand menu
- Click “Add New Content”

- Select "PowerPoint" as the content type
- You may use this content type to specify a PowerPoint presentation (.PPT) file, or a PowerPoint show (.PPS) file
- Set the title of the content item
- Browse to a PowerPoint (.PPT) file on your local PC or network drive

- The system runs in a fully automated and unattended fashion, the presentation will not be prompted by a mouse click to move on to the next slide. As such, your PowerPoint presentation must be set to advance each slide automatically.
- For PowerPoint 2000/2002/2003, go to the “Slide Show” menu, then select “Slide Transition”. Under the “Advance slide” heading, check the “Automatically after” box, and specify how long each slide should be displayed for. Click “Apply to All Slides” if this is appropriate for all slides, or specify the timing individually for each slide.
- For PowerPoint 2007, click the “Animations” tab, then check the “Automatically after” box, and specify how long this slide should be displayed for. Repeat for each slide in the presentation. Ensure you save the file as a Powerpoint 97-2003 (.PPT) file.
- Set the duration of the PowerPoint presentation
- This is the total length of time required for the PowerPoint presentation to be shown.
- This can be calculated by adding up the slide durations of each slide, as set in the PowerPoint file.
- Click the Create button
- Choose a screen (or screens) to schedule this item to (Steps 9 to 14 are the same as in Walkthrough 1 where they are explained in more detail)
- Pick the dates (e.g. from today, for 1 week)
- Choose Regular Item
- Click Save
- Choose the Zone
- Click Schedule
- Log into the admin system using your username and password supplied
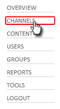
- Click on Channel Manager in the left hand menu
- All channels in your account are listed in the Channel Manager view. From here you can view the status of each channel at a glance, prompting corrective action where necessary.
- Select the channel whose schedule you wish to change
- Clicking on a channel name opens up the properties of that Channel. There are a number of independent settings that can be specified for individual channel, e.g. Volume, resolution, default images, zone layout, on/off times, etc...
- Click "Active Schedule"
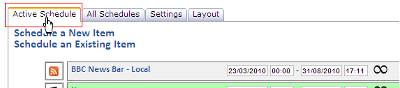
- There are a number of tabs on the Edit Channel page that allow you to view a variety details for this channel.
- The Active Schedule tab displays all currently active items (either presently or scheduled in the future) for an individual zone. From here you can re-order the schedule for each zone.
- For an at-a-glance view of all content scheduled across all zones, click “All Schedules”. This allows you to see not only all currently scheduled items on this channel, it also provides listings of all previously scheduled content, i.e. items that have previously reached the end of their schedule or items that have been actively removed from the schedule.
- The zone layouts can be viewed and (depending on your permissions) modified by clicking the “Layout” tab. You can see the size and position of each zone on this channel, allowing you to create content that is appropriately sized for display.
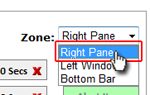 Choose the Zone
- Each zone has an independent schedule. The re-order list shows the schedule for one zone at a time. Select the Zone whose schedule you wish to amend.
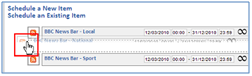 Press and hold the left mouse button on the icon for the item you wish to move and drag it up or down accordingly
- Other items will move around the item you are dragging
- Release the mouse button and the item will now be scheduled where it is in the list.
- Click Save
- Log into the admin system using your username and password supplied
- Click on Channel Manager in the left hand menu
- Select the channel whose schedule you wish to change
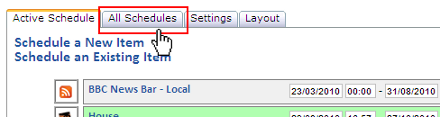 Click "All Schedules"
- Click on the finish date of the item you wish to amend

- You will be taken to the edit schedule page for the scheduling of this item on this channel.
- Amend the end date accordingly
- You can also amend the start date and scheduling type (Regular/Alert/Timed) from this page at the same time.
- Any changes you make here will have no effect on the scheduling of this item on other channels, only this channel. It will also have no effect on any other items on this channel.
- You can also change what times of day the item appears on the screen by editing the day part options e.g. can change to show every day between 13:00 and 16:00.
- Email Notification can be enabled or disabled here as well.
- Click Save Changes
- This will apply the change made on this page
- Click Save
- This will apply all changes to this channel. You do not need to click Save for every individual schedule change, only once you have completed all schedule changes for this channel.
- Log into the admin system using your username and password supplied
- Click on Content Manager in the left hand menu
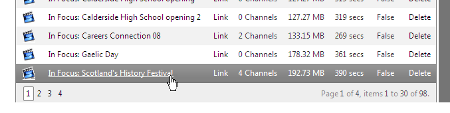 Find the content item you wish to delete scheduling of and click its name
- Warning: If you click Delete instead of the name, you will remove the entire content item from the system, including all of its schedules across all channels along with the file itself.
- If you know which folder the content is in you can browse to that in the folders panel and then find the content there. You can also use the search feature to search for the content item by its name.
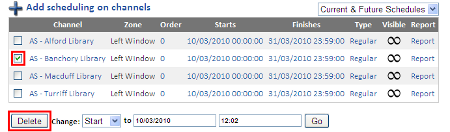 At the bottom of the page, find the channel you wish to remove this item from, check the box beside the channels name and then click the Delete button. If you would like to delete from more than one channel then check these channels as well. You can delete from as many schedules at once as you like.
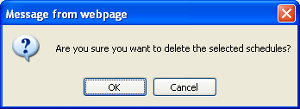 Confirm
you are happy for this schedule(s) to be deleted - click "OK"
Confirm
you are happy for this schedule(s) to be deleted - click "OK"
- Click Save
- This will apply all changes to the Content item.